Bicycle Etiquette Guide: Essential Rules and Safety Tips for Cyclists
Follow us on
social media!
Mastering bicycle etiquette isn’t just about courtesy—it’s a critical part of staying safe on roads, bike lanes, and trails. From signaling turns to knowing when to 'take the lane,' these essential rules help cyclists avoid accidents, earn respect from drivers, and ride with confidence.
By the end of this guide, you’ll know:
- Rules of the road: Learn why following traffic laws matters and how to use hand signals, stop signs, and lane flow safely.
- Lane usage: Tips on positioning, when to take the lane, and effective use of bike lanes.
- Group riding: Proper group cycling etiquette, formation tips, and communication for safe riding.
- Path and trail etiquette: Dos and don’ts of shared paths, like yielding and announcing yourself.
- E-bike guidelines: Key etiquette for e-bikes, including speed management and local rules.
Whether you’re a beginner or an experienced cyclist, you’ll find advice that’s both practical and easy to apply.
Why Bicycle Etiquette Matters for Cyclist Safety
- For Cyclists: Good etiquette helps you be predictable, visible, and safe—qualities that build trust with drivers and other cyclists.
- For Drivers: Clear signals and consistent rules make cyclists’ movements easier to anticipate.
- For Pedestrians and Other Path Users: Following path etiquette keeps everyone’s journey peaceful and free of unexpected surprises.
How Traffic Laws Protect Cyclists and Drivers
Cycling safely on the road isn’t just about wearing a helmet or having lights—it’s also about being predictable. When cyclists follow traffic laws, they’re not only protecting themselves but also helping everyone on the road, from drivers to other cyclists, understand and anticipate each other’s moves. Predictability is safety.
1. Predictable = Safe
Think of yourself as part of a flow with other vehicles. Every car, cyclist, and walker is making decisions based on the behavior they expect from others. As a cyclist, if you act unpredictably—like suddenly swerving or ignoring traffic lights—you make it harder for others to respond appropriately.
2. Use Hand Signals Properly
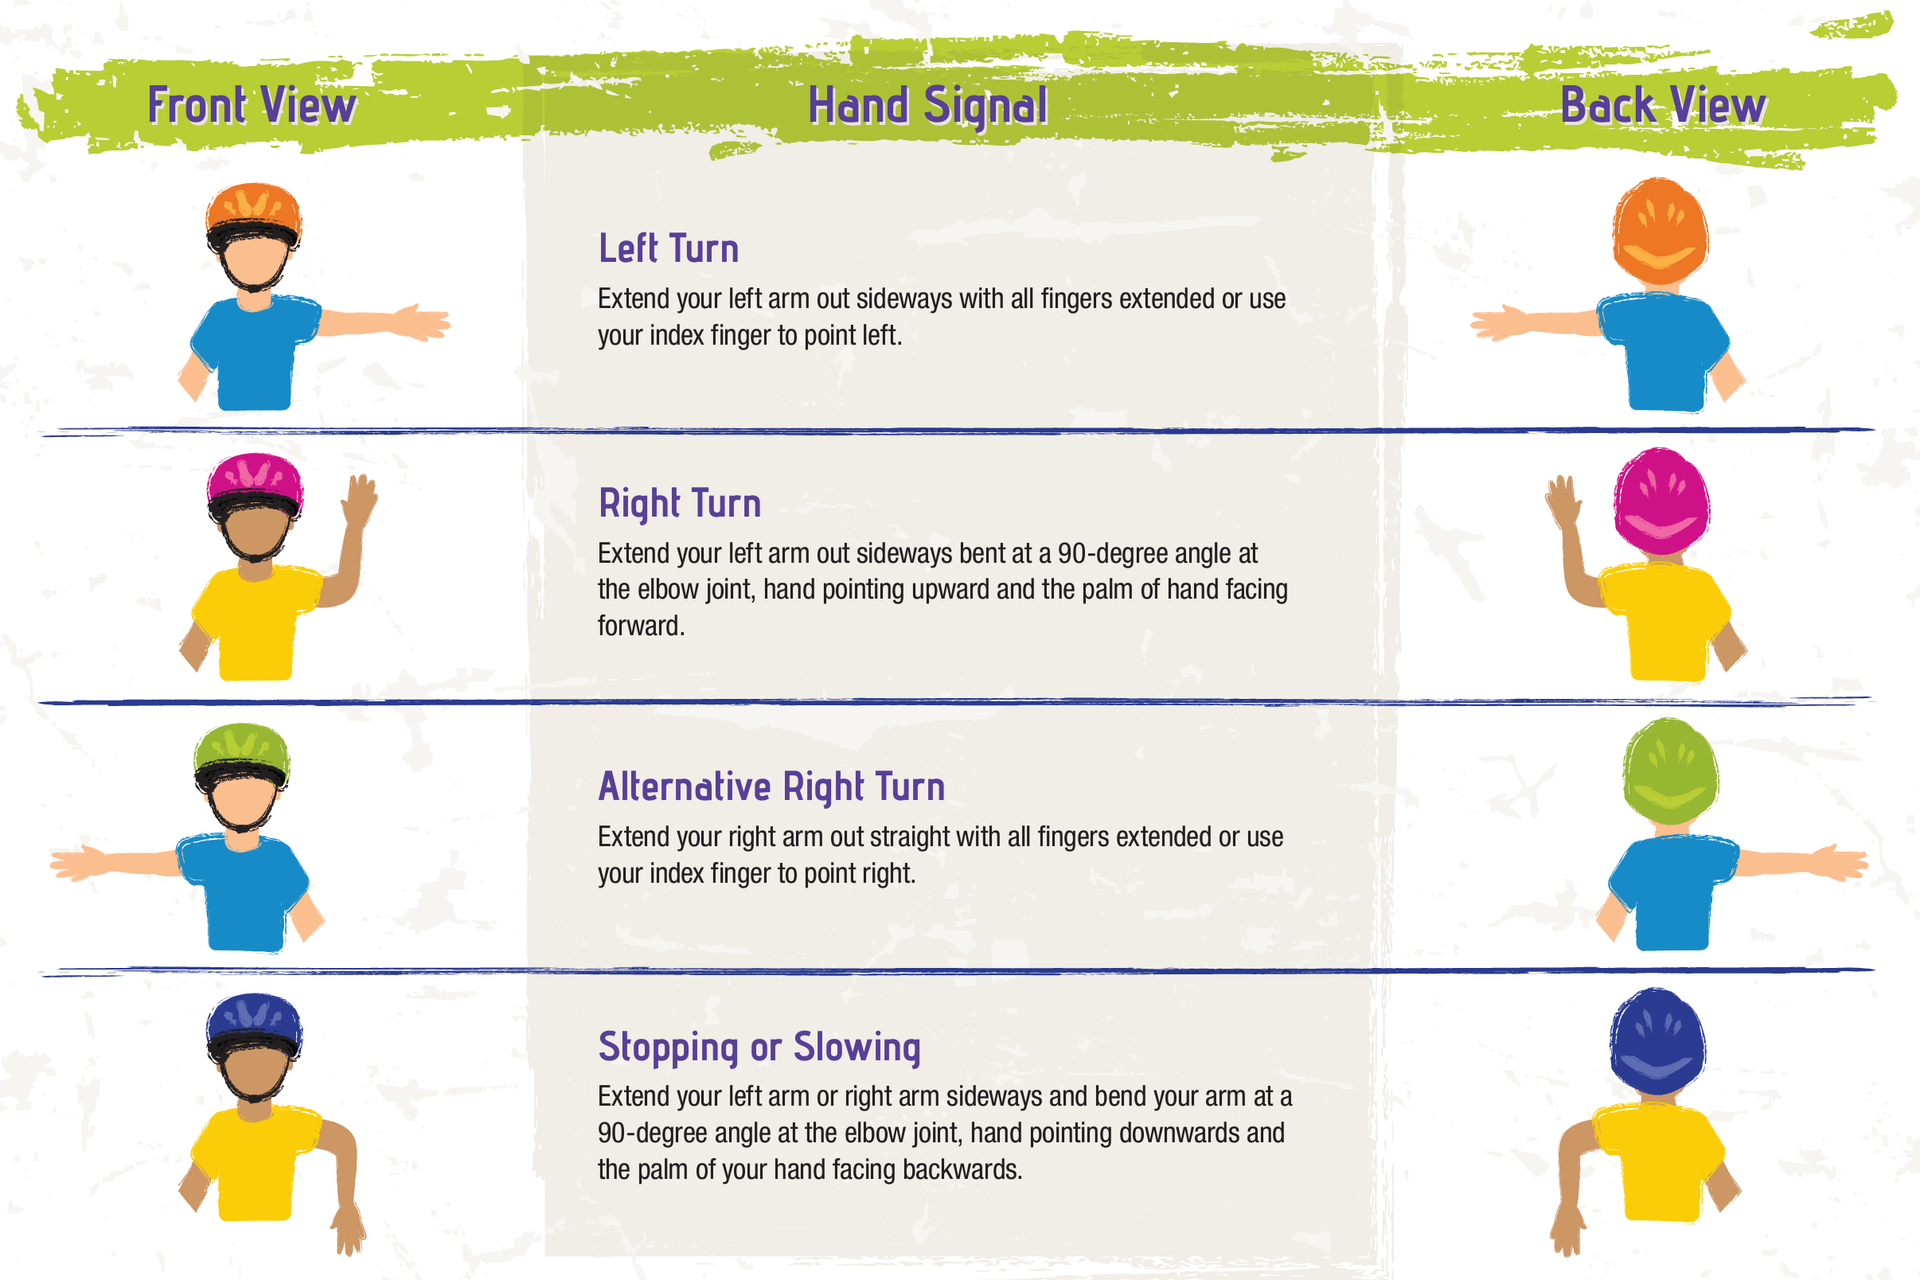
Hand signals are a cyclist’s version of turn signals and brake lights. They let drivers and pedestrians know exactly where you’re going next. When used consistently, hand signals can make a huge difference in your visibility and predictability.
Basic Bicycle Hand Signals:
- Left Turn: Left arm straight out to the side.
- Right Turn: Left arm bent at the elbow, hand pointing up OR right arm straight out to the side.
- Stop: Left arm bent at the elbow, hand pointing down.
Pro Tips for Effective Hand Signaling:
- Make Eye Contact: Whenever possible, make eye contact with drivers at intersections or stops to confirm they’ve seen you.
- Signal Early: Start signaling 3-5 seconds before you turn or stop. This gives drivers time to adjust.
Learn more in our article: 11 Hand Signals Every Cyclist Must Know on the Road
3. Stopping at All Traffic Signals and Signs
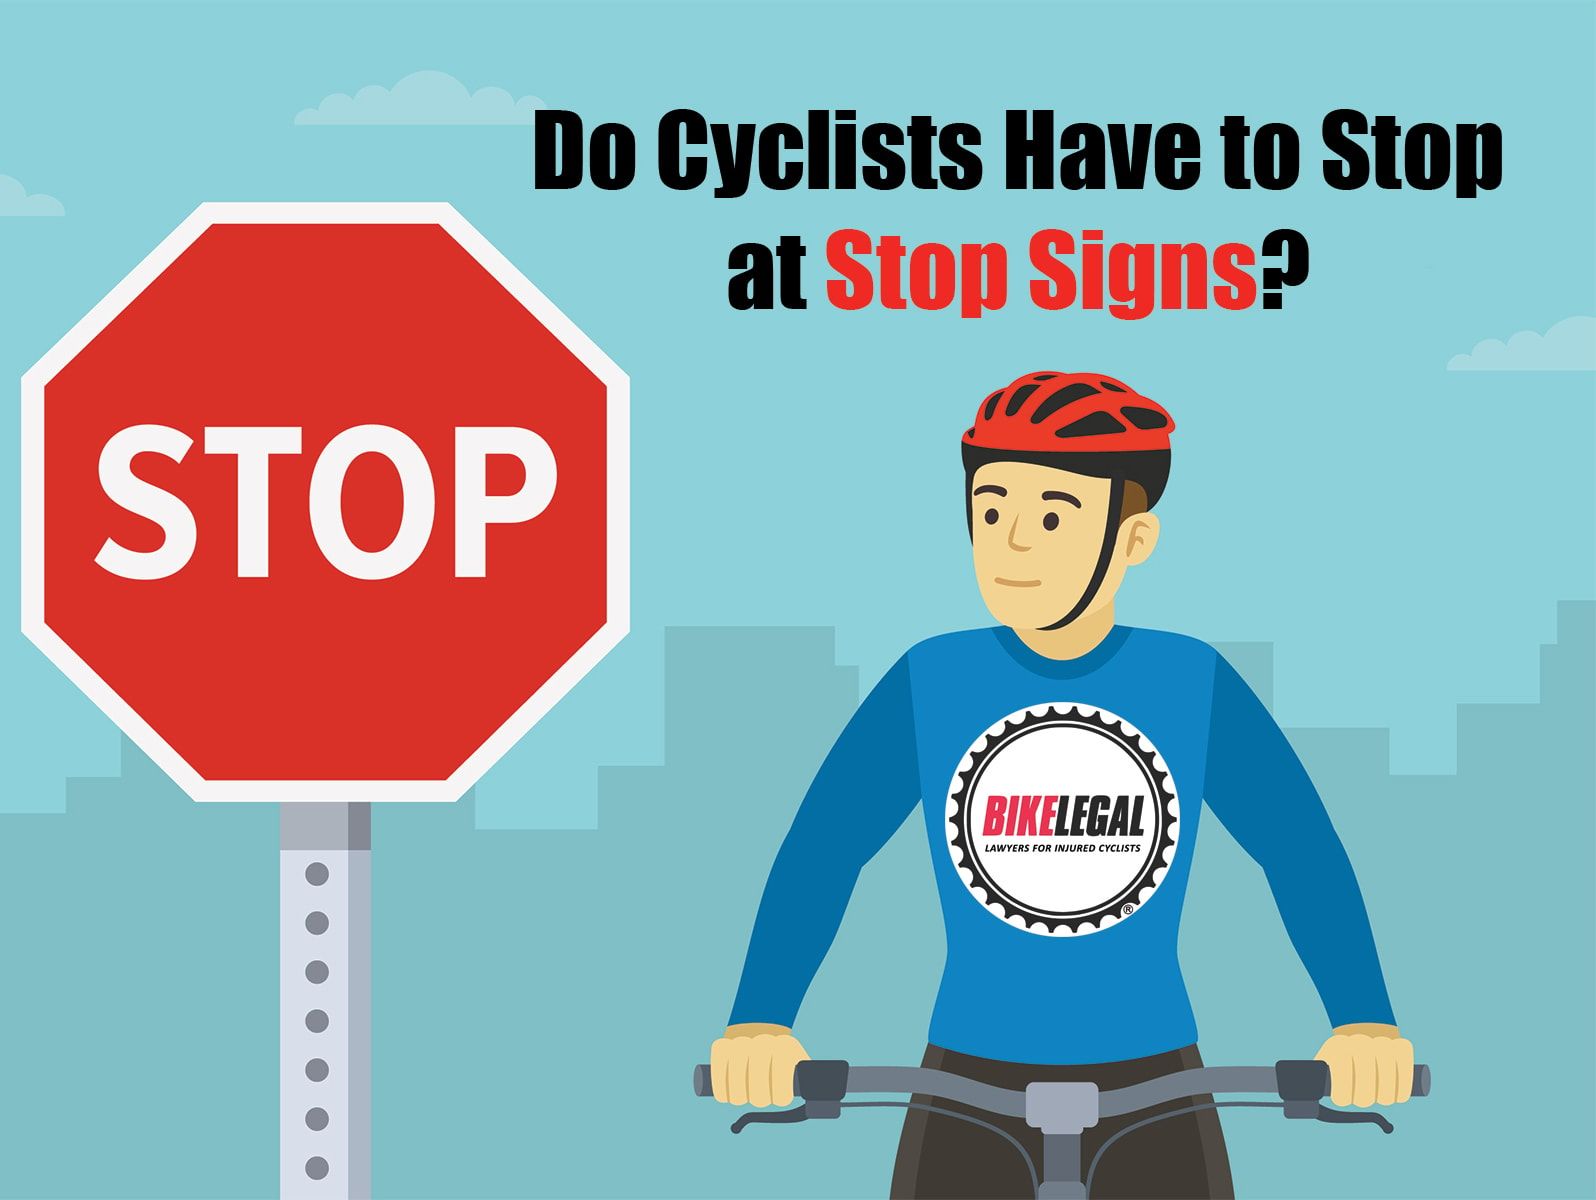
It might be tempting to ride through a stop sign, especially when it feels like no one’s around. But here’s the thing: stopping at lights and stop signs isn’t just a legal requirement—it’s a matter of safety and respect for all road users.
Why It Matters:
- You’re Subject to the Same Rules: In the U.S., cyclists are required by law to follow the same traffic signals and signs as cars.
- Predictability for Drivers: Drivers expect cyclists to stop at signs and signals, just as they would a car. When cyclists don’t stop, it leads to dangerous situations, confusion and tension.
Pro Tip: Treat intersections as negotiation zones. Stopping helps you communicate with other drivers and road users about traffic conditions and who goes first, reducing the chance of accidents.
When Are Rolling Stops for Cyclists Allowed? (The Idaho Stop)
The "Idaho Stop" refers to a traffic law that allows cyclists to treat stop signs as yield signs and red lights as stop signs under certain conditions. Originally adopted in Idaho in 1982, this law aims to improve traffic flow and reduce unnecessary stops for cyclists.
Not all states have adopted this law, so check your local bicycle laws first.
The Idaho Stop and Dead Red Stop Laws:
- Cyclists can proceed through a stop sign after yielding to traffic and ensuring the intersection is clear.
- At red lights, cyclists must come to a complete stop but may proceed when the intersection is clear, similar to a right-on-red for cars.
States with Idaho Stop Laws:
- While Idaho pioneered the law, other states like Delaware, Arkansas, and Oregon, and Utah have adopted similar variations of the Idaho Stop.
Read more: Do Cyclists Have to Stop at Stop Signs?
4. Ride With the Flow of Traffic, Not Against it
One common myth that some cyclists may have is that riding against traffic is safer because they can “see” cars coming. However, riding a bicycle against the direction of traffic is both unsafe and usually illegal for several reasons:
Legal Implications: In most U.S. states, cyclists are required to ride in the same direction as traffic. This aligns with traffic laws designed to create a predictable flow of movement, reducing confusion and risk.
Crossing Hazards: Drivers typically check for traffic coming from the expected direction. Cyclists riding against traffic are often overlooked, increasing the risk of intersection-related accidents.
Difficulty Navigating Intersections: Cyclists riding against traffic must navigate intersections and crosswalks in a way that defies standard traffic flow, creating confusion for drivers, pedestrians, and other cyclists.
Lane Positioning Tips: How Cyclists Can Stay Safe and Visible on the Road
Positioning yourself correctly on the road is essential for safe cycling. The right lane position can make you more visible, reduce the risk of accidents, and give you better control. While it might feel natural to stick to the far right, there are times when taking the lane over—or positioning yourself in the center of the lane—is actually the safest choice.
Know When to “Take the Lane”
Taking the lane means riding closer to the center of the lane instead of hugging the right edge. While it may feel intimidating, taking the lane can prevent dangerous close-passing and put you in a more visible, predictable position.
When to Take the Lane:
- Narrow Lanes: If a lane isn’t wide enough for both a car and a bike to travel side by side safely, it’s safer for the cyclist to take the lane. This forces cars to move into the adjacent lane to pass.
- Approaching Intersections: In busy intersections or when crossing multiple lanes, positioning yourself in the center can make you more visible to drivers who may not expect a cyclist near the curb.
- Avoiding Obstacles: Hazards like potholes, debris, and parked cars can push you into traffic if you’re riding too close to the edge. Moving into the lane allows you to navigate around obstacles more smoothly.
Legal Basis:
- According to many U.S. state laws (like California’s CVC 21202), cyclists are allowed to take the lane when it is “reasonably necessary” to avoid unsafe conditions. This rule recognizes that cyclists sometimes need the full lane to stay safe.
Read More: The Bicycle Lane Debate-Should Motorists Share the Road?
Shared Path and Trail Etiquette: Best Practices for Safer Multi-Use Paths
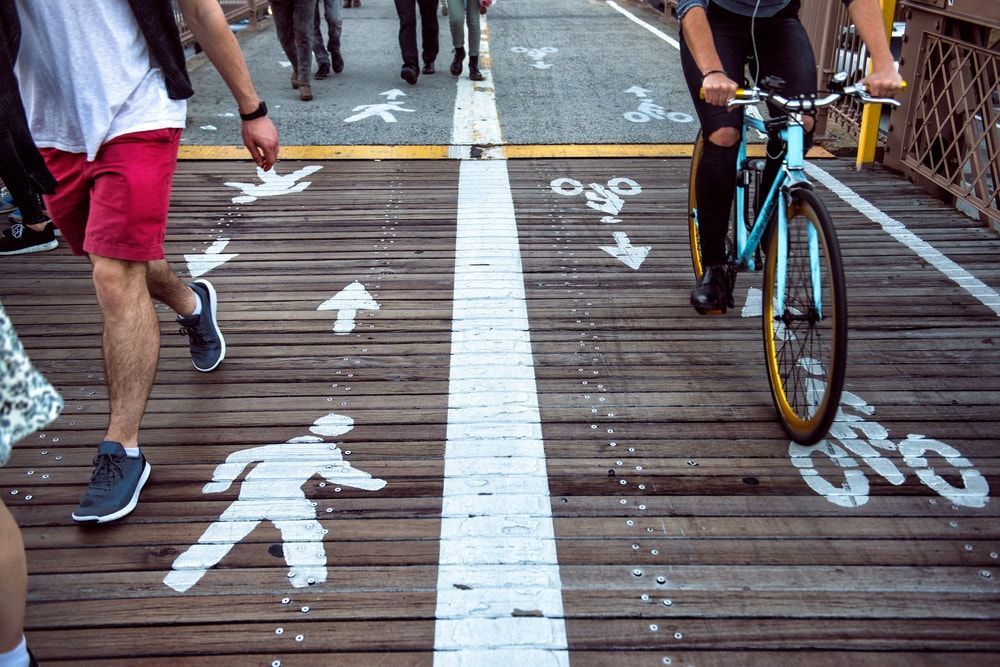
When cycling on shared paths or trails, you’re often sharing the space with pedestrians, runners, and sometimes even pets. Being courteous and predictable not only keeps the peace but also prevents accidents. Here’s how to navigate shared paths with respect and safety in mind.
1. Respect Pedestrians’ Right of Way
Pedestrians always have the right of way on shared paths. Slowing down, announcing yourself, and giving them space helps create a safer environment for everyone.
Key Actions:
- Slow Down: As you approach pedestrians or slower users, ease off the speed. This reduces the risk of collisions and makes it easier to stop quickly if needed.
- Give Extra Space: If there’s room, pass pedestrians with at least a 3-foot buffer and pass on the left.
- Be Patient: Paths can get crowded, especially on weekends or in popular areas. Being patient and respecting everyone’s pace helps maintain a positive atmosphere.
Pro Tip: Think of shared paths as a walking-first environment.
Want to explore bike-friendly cities with safe shared paths? Check out our list of Top 10 Bike-Friendly US Cities.
2. Announce Yourself Clearly
Clear communication prevents surprises. Announcing yourself when passing others is essential for shared paths—whether you’re using a bell, your voice, or both.
How to Announce Properly:
- Use a Friendly Tone: A calm, friendly “On your left” or “Passing on your left” works well. Avoid shouting or startling others, especially on quiet paths.
- Give Enough Notice: Announce your presence about 10-15 feet before you pass. This gives people enough time to process and react without feeling rushed.
- When to Use a Bell: Bells work best in busy areas where frequent announcements might become distracting or on winding trails where visibility is low. A bell signals your approach without the need to speak every time.
Considerations for Trails vs. Shared Paths
Understanding the difference between trails mountain bike shoes and shared paths is essential, as each has unique etiquette requirements. Here’s a quick breakdown:
| Etiquette | Trails (Hiking/Biking) | Shared Paths (Urban/Family Paths) |
|---|---|---|
| Right of Way | Uphill riders and hikers often have the right of way. | Pedestrians always have the right of way. |
| Announcing | Use a bell or a calm “passing” call. | Use a friendly “On your left” or bell to signal. |
| Speed Control | Moderate your speed based on trail conditions. | Keep speeds low, especially around families. |
| Passing Space | Pass with more space for hikers and uphill riders. | 3-foot buffer when passing pedestrians. |
| E-Bike Regulations | Check if e-bikes are allowed; many trails restrict them. | Follow any posted speed limits or local regulations. |
E-Bike Etiquette, Safety, and Regulations on Shared Paths and Trails

E-bikes have surged in popularity, offering a convenient, eco-friendly alternative to traditional bicycles. However, their increased speed and power present unique challenges on shared paths and trails. Understanding proper etiquette, safety practices, and local regulations is essential for responsible riding.
E-Bike Etiquette
1. Yield to Pedestrians and Announce Your Presence
- Always yield to pedestrians on shared paths and trails. Pedestrians have the right of way, and e-bike riders must slow down and give them ample space.
- When approaching pedestrians, reduce your speed and announce your presence with a friendly "On your left" or use a bell.
2. Respect Other Path Users
- Ride predictably to avoid sudden movements that might surprise pedestrians or other riders.
- On crowded paths, reduce your speed and be patient. Avoid weaving in and out of traffic.
3. Share the Path
- Stay on the right side of the path unless passing. Pass on the left and only when it is safe to do so.
- If riding with others, avoid blocking the path by riding side-by-side, especially during busy times.
E-Bike Regulations on Shared Paths and Trails
E-bike regulations vary by state, city, and trail system. Riders must be familiar with local rules before hitting shared paths or trails.
Here’s an overview of common regulations:
1. Check for E-Bike Restrictions
- Some trails prohibit e-bikes entirely, while others only allow Class 1 or Class 2 e-bikes.
- Check local trailhead signage or park websites to determine if e-bikes are permitted on specific trails.
2. Adhere to Speed Limits
- Speed limits for e-bikes on shared paths typically range from 10-15 mph. Riders must slow down to maintain safety for all users.
- If no speed limit is posted, ride at a "safe and reasonable" speed based on traffic and path conditions.
3. Follow Local E-Bike Laws
- E-bike classifications (Class 1, Class 2, and Class 3) determine where e-bikes are allowed to operate. For instance, Class 3 e-bikes may be restricted from certain paths and trails.
- Laws vary by state and city, so check with local transportation or parks departments for specific regulations.
4. Follow General Bicycle Laws
- E-bikes are often subject to the same rules as traditional bicycles, including yielding, signaling turns, and stopping at intersections.
- Pay attention to "no e-bike" signs or "walk your bike" zones, especially in high-traffic areas like boardwalks or nature trails.
Read More: Everything You Need to Know About E-Bikes
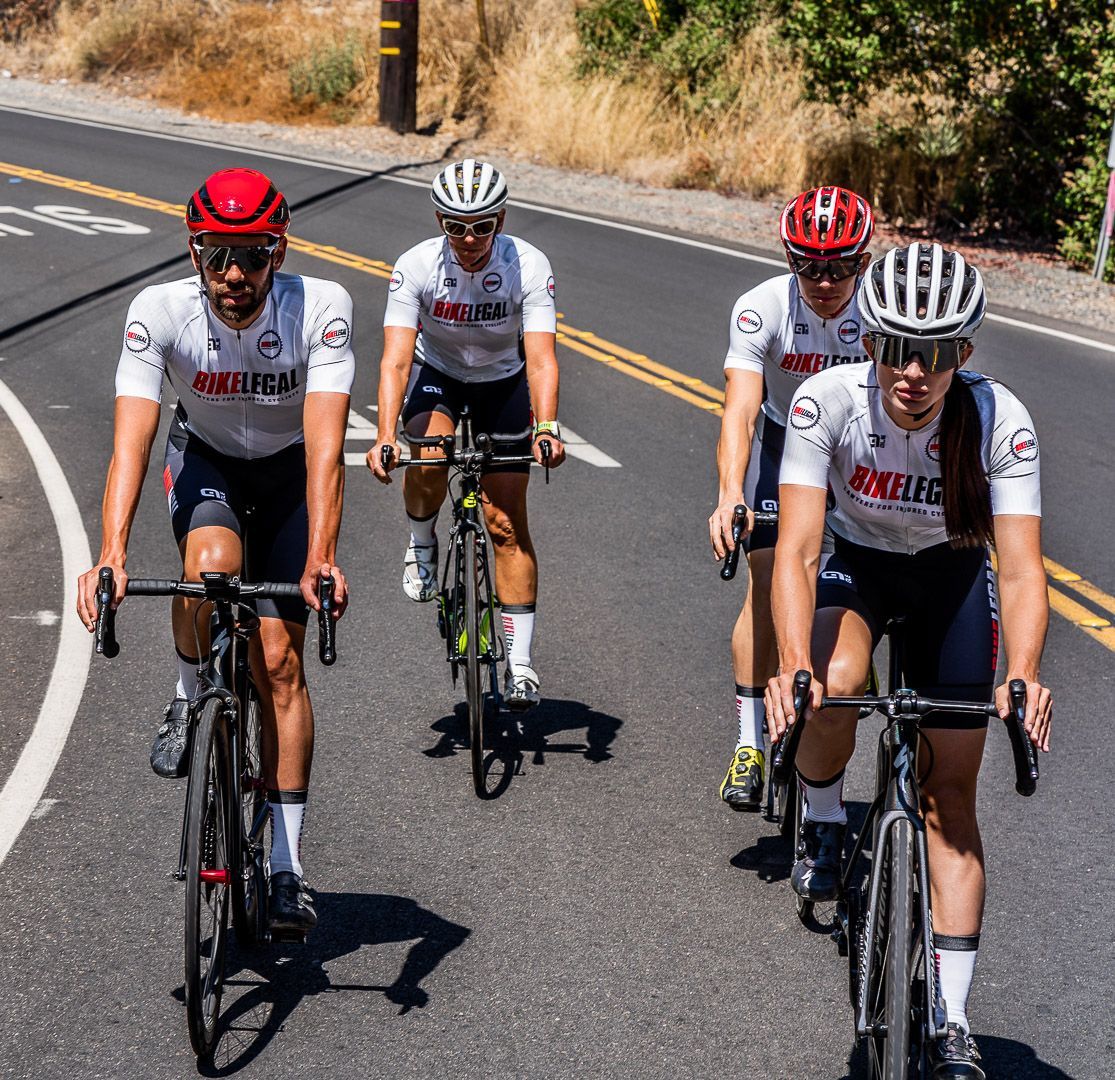
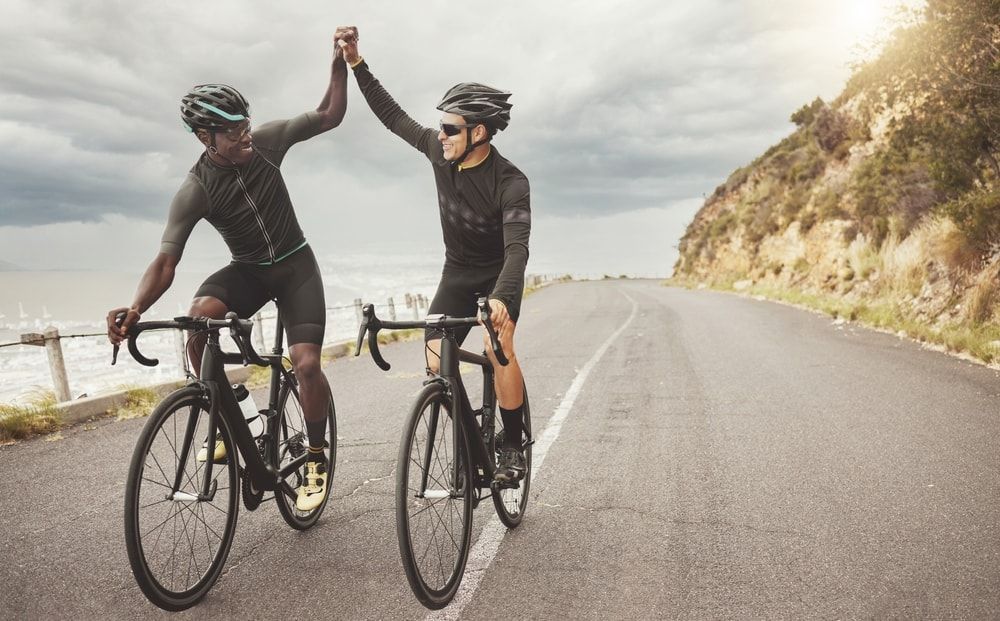
Group Riding Etiquette: Keep It Fun, Safe, and Predictable

Riding in a group has its advantages—greater visibility, shared effort, and a more fun social experience. But with multiple cyclists comes the need for coordination and clear etiquette.
Here’s how to keep your group rides safe, enjoyable, and predictable for everyone.
1. Single File vs. Side-by-Side Riding
Riding two-abreast (side-by-side) is a common practice among cyclists, but it’s not always safe or legal. Here’s a breakdown of when it’s permissible and how to do it safely:
- Check Local Laws
- State and local laws vary on when cyclists can ride side-by-side. Some states allow it on all roads, while others restrict it to certain conditions, such as when the lane is wide enough to accommodate both cyclists and cars.
- In many places, riding two-abreast is allowed as long as it doesn’t impede traffic flow. Check your state’s bicycle laws to know for sure.
- Use It Only on Wide Roads
- Riding side-by-side is safest on roads with wide lanes, or dedicated good bike lanes.
- Group Rides and Safety Considerations
- In group rides, riding side-by-side increases visibility and can make it easier for drivers to spot cyclists.
- However, riders should be prepared to switch to single file if traffic increases or if road conditions change.
- Avoid Riding Two-Abreast in Busy Areas
- On narrow or busy roads, riding single file allows cars to pass safely and minimizes the risk of conflict with motorists.
- Avoid riding two-abreast on curves, blind spots, or in areas with limited visibility.
- Safety Tips for Riding Two-Abreast
- Maintain consistent speed and communication with your riding partner.
- Call out "Car back!" when a vehicle is approaching from behind, and move to single file when necessary.
- Be prepared to ride single file in high-traffic areas or when the lane narrows.
When to Ride Single File:
- Narrow or Busy Roads: On narrow roads or roads with heavy traffic, riding single file is safer and gives drivers room to pass.
- Curves and Blind Spots: In areas with limited visibility, single file is safer, reducing the risk of a collision with an oncoming vehicle or other road users.
- Narrow or Unkept Bike Lanes: Many bike lanes aren’t wide enough for two riders side-by-side. Others have more debris and frequent obstacles.
2. Take Turns Pulling (Lead Position)
Rotating the pull (lead position) is a fundamental technique for energy management and group cohesion on longer rides. The lead rider blocks wind and clears the way for others, but this position requires more energy. By rotating, everyone shares the workload, making the ride more manageable for the entire group.
How to Rotate the Lead Position:
- Switch Regularly: The lead rider should pull off to the side after a few minutes or a designated distance and rejoin at the back of the group. The next rider in line takes over as the lead.
- Avoid Abrupt Changes and Surges: Don’t suddenly drop speed when moving out of the lead. Signal your intention, ease to the side, and gradually slow down to join the back of the line.
- Agree on Rotations Beforehand: Before the ride, discuss with the group how often you’ll rotate. Having a set interval keeps everyone on the same page.
Pro Tip: Headwinds and hills can make the lead position even more demanding. Rotate more frequently in these conditions to keep everyone’s energy balanced.
3. Communication is Key
Clear, consistent communication is vital in group riding. Quick calls, hand signals, and head nods keep everyone aware of upcoming hazards, changes in speed, and the need to stop. Here’s a guide to the most useful communication methods for group rides.
Essential Calls:
- “Car Back” or “Car Up”: Alerts the group to a car approaching from behind (“Car Back”) or in front (“Car Up”), prompting everyone to stay single file or ride cautiously.
- “Slowing” or “Stopping”: Call out when you’re slowing or stopping to avoid rear-end collisions within the group.
- “On Your Left”: Use this when passing pedestrians, other cyclists, or vehicles. It signals your intent to pass, reducing surprise.
Key Hand Signals:
- Pointing Down: Signal hazards like potholes or debris by pointing down toward the obstacle on the road.
- Left or Right Turns: Signal turns with your left arm—straight out for a left turn, or bent up at the elbow for a right turn.
- Slowing Down: Put your hand down at your side, palm facing back, to signal that you’re reducing speed.
Your Ultimate Bicycle Etiquette Checklist for Every Ride
Cycling safely and respectfully isn’t complicated, but it does require mindfulness and consistency. Here’s a quick, easy-to-reference checklist of the top etiquette practices to follow every time you ride. These principles keep you and others safer, reduce conflicts, and create a smoother, more enjoyable ride for everyone involved.
Your Bicycle Etiquette Checklist
Each of these items is straightforward but critical for maintaining good cycling etiquette. Review this checklist before each ride and aim to practice each habit regularly.
1. Always Follow Traffic Laws
- Riding with cars means following the same rules as cars. Obey speed limits, yield signs, and traffic lights. Predictable behavior helps everyone on the road anticipate your movements and respond safely.
2. Use Hand Signals to Communicate
- Clear hand signals let drivers, pedestrians, and other cyclists know what you’re about to do. For left turns, extend your left arm straight out. For right turns, raise your left arm to a 90-degree angle or extend your right arm out. To indicate stopping, point your left arm down with your palm open.
3. Stop at Signs and Lights
- This is more than just following the law; stopping at signs and lights reinforces that you’re sharing the road responsibly. Many accidents happen at intersections, so make it a rule to stop fully, check your surroundings, and proceed only when it’s safe.
4. Ride with the Flow of Traffic
- Riding with traffic (not against it) makes you more visible to drivers and aligns your actions with the natural flow of the road. Drivers are used to anticipating movement in their lane, so riding with traffic helps keep you predictable and safe.
5. Yield to Pedestrians
- Pedestrians always have the right of way, especially on shared paths and crosswalks. Slow down when approaching them, announce your presence if you’re passing, and always give them extra space. Pedestrians might make sudden movements, so stay alert.
6. Announce Your Presence
- Use a friendly “On your left” or a bell to let pedestrians and other cyclists know you’re passing. This prevents startling them and helps everyone adjust their movements smoothly. Make your announcement early—about 10-15 feet before you pass.
7. Stay Visible and Predictable
- Wear bright or reflective clothing, especially if you’re riding in low light. Equip your bike with front and rear lights for visibility. Avoid sudden stops, lane changes, or erratic movements that other road users can’t anticipate. The more predictable you are, the safer your ride will be.
The Path to Safer, Friendlier Roads
Cycling with respect and responsibility isn’t just about following road rules.—it’s about creating a road culture where everyone feels safe and valued. The choices you make as a cyclist influence how others see and respond to all cyclists. Setting a positive example encourages drivers, pedestrians, and other cyclists to view cycling as a respected and safe mode of transportation.
Benefits of Courteous Cycling:
- Increased Safety for Everyone: Courteous riding habits reduce the likelihood of accidents, conflicts, and misunderstandings, creating a road environment where incidents requiring a bicycle crash lawyer are less common.
- Building Positive Relationships on the Road: When cyclists show respect, drivers and pedestrians are more likely to respond positively, making roads friendlier for everyone and reducing the need for a bike accident lawyer.
- Setting an Example for New Cyclists: By consistently practicing good etiquette, you’re setting a standard for other cyclists, including those just starting out. This helps reinforce a strong, positive cycling culture and reduces the likelihood of incidents that may require assistance from a bicycle accident law firm or bicycle accident attorney.
Consider how each action—whether it’s using a hand signal, slowing down, or yielding—contributes to a safer road culture. Consistent, respectful habits lead to a better experience for everyone and make the road a safer place.
Bike Legal Firm is Here if You Need Support
Even with the best etiquette, accidents can still happen. When situations arise that require legal support, it’s essential to have a dedicated bicycle accident law firm to turn to. As a trusted bike injury lawyer and cycling accident law firm, Bike Legal has extensive experience helping cyclists navigate legal issues related to accidents, injuries, and road conflicts.
If you have been involved in a bicycle accident, your friends at Bike Legal are in your corner to provide peace of mind, education, and possible legal support when you need it most.
Request a free consultation by calling 877-BIKE LEGAL (877 245-3534)

Ride Protected. Ride Safe, with Bike Legal
At Bike Legal our mission is to advocate for bicycle safety and sharing the road responsibly through education. Our legal team is committed to supporting and representing cyclists across the United States no matter where you ride or how you ride.